Showing posts with label ionic 4. Show all posts

Sunday, August 11, 2019

ITMS-90338: Non-public API usage - The app references non-public selectors in _setAlwaysRunsAtForegroundPriority


I got below email from apple - 

Dear Developer,
We identified one or more issues with a recent delivery for your app, 
"-------". Please correct the following issues, then 
upload again.
ITMS-90338: Non-public API usage - The app references non-public 
selectors in ----: _setAlwaysRunsAtForegroundPriority:. If method names 
in your source code match the private Apple APIs listed above, altering 
your method names will help prevent this app from being flagged in 
future submissions. In addition, note that one or more of the above APIs 
may be located in a static library that was included with your app. If 
so, they must be removed. If you think this message was sent in error 
and that you have only used Apple-published APIs in accordance with the 
guidelines, send the app's Apple ID, along with detailed information 
about why you believe the above APIs were incorrectly flagged, to 
appreview@apple.com. For further information, visit the Technical 
Support Information at http://developer.apple.com/support/technical/
Best regards,
The App Store Team


Solution - This mostly comes with ionic / Cordova / Phonegap / Hybrid Apps. Please follow the below steps to solve this issue -
  
Stpe 1 -
cordova plugin rm cordova-plugin-ionic-webview

Stpe 2 -
cordova plugin add cordova-plugin-ionic-webview@4.1.0

This solved my problem. Hope so this will also work for you. If you have any questions related with this you can post a comment here.

Tuesday, April 16, 2019

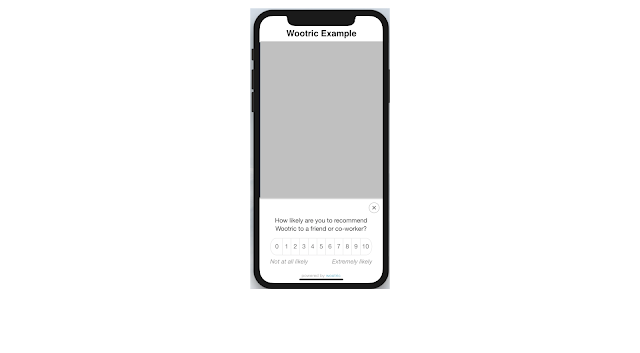
How to integrate wootric in ionic


Wootric integration with ionic 

There are two options to implement this -

Option 1 - Add below code after “build/main.js” Or add at the bottom of page.

<!-- start Wootric code -->
<script type="text/javascript" src="https://cdn.wootric.com/wootric-sdk.js"></script> 
<!-- end Wootric code -->


Now in your TS file (Where you want to trigger wootric survey) add below code -

/* Wootric code start */
 window['wootric_survey_immediately'] = true; // Comment out the line wootric_survey_immediately = true when you are ready for production. Alternatively, leave the line in the code for testing purposes or to survey the customer upon every visit to a specific page.
 window['wootricSettings'] = {
   email: (user.email)?user.email:'',
   created_at: Math.floor(Date.now() / 1000),
   account_token: "NPS-********”, // You need to update your account token here
   otherData: {
     city: user.city,
     role: user.role
   }
 };
// console.log('wootricSettings:', window['wootricSettings']);
//console.log('WootricSurvey');
window['WootricSurvey'].run("wootricSettings");
/* Wootric code end */


This will trigger wootric survey on the selected page.
Note - You need to update account token on “NPS-XXXXXXXX”

Here - user.email is user email id, otherData are additional data which you want to send on wootric.


Option 2 - You can also integrate into the ionic framework with the help of javascript code. To integrate this you just need to follow below steps -

Insert below javascript code in the bottom of your index.html file 

<!-- start Wootric code -->
<script type="text/javascript">
  window.wootric_survey_immediately = true; // Shows survey immediately for testing purposes. TODO: Comment out for production.
  window.wootricSettings = {
    email: 'customerEmail@example.com', // TODO: Required to uniquely identify a user. Email is recommended but this can be any unique identifier.
    //external_id: '123abc', // TODO: Reference field for external integrations only. Send it along with email. OPTIONAL
    created_at: 1234567890, // TODO: Date as a 10 digit Unix timestamp in seconds. OPTIONAL
    account_token: 'NPS-XXXXXXXX' // This is your unique account token.
  };
</script>
<script type="text/javascript" src="https://cdn.wootric.com/wootric-sdk.js"></script>
<script type="text/javascript">
  // This loads the Wootric survey
  window.wootric('run');
</script>
<!-- end Wootric code -->


This will trigger wootric survey when your all launch.  


You can check more about this on this URL (Reference URL) - https://engineering.wootric.com/testing-the-wootric-sdk-with-ionic-framework


If you have any questions you can post here in the comment section. Thanks, All the best.

Sunday, March 10, 2019

Undefined symbols for architecture x86_64


Hello All,

I am getting below error when I try to run the project in Xcode -


Undefined symbols for architecture x86_64:

  "_OBJC_CLASS_$_SKStoreProductViewController", referenced from:

      objc-class-ref in CDVAppRate.o

  "_SKStoreProductParameterITunesItemIdentifier", referenced from:

      ___29-[CDVAppRate launchAppStore:]_block_invoke in CDVAppRate.o

ld: symbol(s) not found for architecture x86_64

clang: error: linker command failed with exit code 1 (use -v to see invocation)


I have found the solution for this error. The solution is very simple, You need to add the StoreKit framework. To add this follow below steps -


1. Clicking on your project in the upper left of the left pane and select project from TARGETS -


2. In the middle pane you can see the "Build Phases" section, Now click on the Build Phases tab.

3. After this under "Link Binary With Libraries", click on the plus button.


4. Now search for "StoreKit" and find the StoreKit from the list and press Add button.


Now run the project again and the project will get run successfully. This works for me if you are still facing any issue please post your error in the comment section. I will try to resolve this issue.

Note - In my case this issue I faced in ionic / Cordova projects. But this is a common issue related to Xcode.   

Thursday, February 7, 2019

The sandbox is not in sync with the Podfile.lock in ionic


In my case, I was building an ionic project. This error comes when I try to run the project in iSO. I spend much time to resolve this issue, Some say we can run pod update OR pod install command to resolve this issue. But noting work in my case. Finally, I found the solution for this. This is very simple. Just follow the below steps to resolve the issue -    

1. First Quit your Xcode.
2. Now move in iOS platform folder. (i.e, Project Dir/platforms/ios)
3. Delete Pods folder from here.
4. Delete Podfile.lock from here.
5. Now open ios platform in the terminal and run "pod install" command in terminal. Make sure to run this command without admin (without sudo).
6. Now open your project in Xcode. Note - Open project via .xcworkspace file.

Now build and run the project, If that does not work follow below more steps - 

7. In Xcode, From navigation go to root node and from the Xcode on the right choose 'Build Settings' option.  Check more information in below image -


8. Now scroll down and there should be following entries - PODS_PODFILE_DIR_PATH and PODS_ROOT. If this available please correct the entry and if not available please add the entry by using below details - 


8.1 Click on the plus (+) icon to add the entry and select "Add user-defined settings". Check below image -


8.2 Add "PODS_PODFILE_DIR_PATH" and for both Debug and Release add "${SRCROOT}/." entry.
8.3 Now again add "PODS_ROOT" and for both Debug and Release add "${SRCROOT}/Pods" entry.

After adding the above details it will look like this -


Now try to build your project. It will build successfully. If still, you are facing any issue please post your error in the comment section. I will try to resolve this issue.

Wednesday, January 23, 2019

Show image loader in ionic | html


In above image please check 1,2,3 cases.
Case 1 - Image is not loaded so here loader is showing.
Case 2 - Image is half loaded so still image loader is showing.
Case 3 - Image is fully loaded so loader is not showing.


Solution -

Hey guys, There are many third-party libraries available for this but when I try those libraries nothing working properly. So I found a solution with the help of CSS. This is very simple and easy to use. In this solution, we will show loader git until the image load in img tag. So now check below details for solution -


First, in your CSS file add below class -

.default-img-loader{
  background: url('../assets/img/loader.gif') no-repeat center;
}

This class will add a background image to the image tag. Here we used below property -
url('../assets/img/loader.gif')  - Make sure to update path according to your project.
no-repeat  - This will not repeat image in background.
center - This will place the image in center.


Now, In your HTML (template) file add “default-img-loader” class in image tag.
Eg- 

<img class=“default-img-loader” src=“your image url path of server”>


Note - Gif image size should be 16 × 16 OR 18 × 18 for batter experience. You can download loader from below URL -


Feel free to post a comment if you face any issue during the implementation of this. 


This will help in this case when you are fetching images from server and image size is very long. With the help of this solution, you can show loader until the image fully load. This will work for ionic, HTML, angular, PhoneGap etc. This works for me. I develope ionic app and its working perfect in this.


Monday, January 21, 2019

Could not find an installed version of Gradle either in Android Studio, or on your system to install the gradle wrapper. Please include gradle


CordovaError: Could not find an installed version of Gradle either in Android Studio,
or on your system to install the gradle wrapper. Please include gradle


To solve this issue you have to install gradle. To install gradle please use below steps -

For debian/ubuntu - If your system is a debian/ubuntu then, in this case, you can use below command on the terminal to install gradle. 
sudo apt-get install gradle


For Mac - If your system is a Mac then follow below steps -  

First, download the gradle binary only distribution with the help of this URL - https://gradle.org/gradle-download/
Now open your system terminal and run the following command to unzip the android sdk into the development directory that is under your user home directory
unzip ~/Downloads/gradle-3.1-bin.zip -d ~/Development

To edit base profile open vi editor. We also need to set GRADLE_HOME environment variable 
vi ~/.bash_profile

To enter in edit mode in vi editor hit i and now add below text to .bash_profile
export GRADLE_HOME=~/Development/gradle-3.1/bin

To exit edit mode press Esc key 
To enter in command mode press : (colon key)

To save changes and exit vi editor type wq and press enter key.

To update changes run the following command 
source ~/.bash_profile

Now test this by running below command in terminal 
echo $GRADLE_HOME

For Windows - If your system is a Windows then follow below steps -   
This is a very long process, Here are some steps for windows. Just follow all steps mentioned on below URL -
http://bryanlor.com/blog/gradle-tutorial-how-install-gradle-windows

Monday, January 14, 2019

An error occurred while running subprocess ionic-app-scripts


An error occurred while running subprocess ionic-app-scripts. ionic-app-scripts build exited with exit code 1.
        Re-running this command with the --verbose flag may provide more information.


Solution - 

This is due to the latest version of ionic and Cordova in your system but your project does not support this version.

Run below command in your project -

ionic info

Below is the above command result - 
cli packages: (/usr/local/lib/node_modules)

    @ionic/cli-utils  : 1.19.2
    ionic (Ionic CLI) : 3.20.0

global packages:

    cordova (Cordova CLI) : 8.1.2 (cordova-lib@8.1.1) 

local packages:

    @ionic/app-scripts : 1.3.0
    Cordova Platforms  : android 6.3.0 ios 4.3.1
    Ionic Framework    : ionic-angular 3.0.1

System:

    Node : v10.14.2
    npm  : 6.4.1 
    OS   : macOS High Sierra


Here as we can see Ionic CLI version is “3.20.0” so we need to update CLI version to this, Then I can build the project without error.


To update CLI version please run below command -


npm i -g ionic@3.20.0


Above command result is -
npm i -g ionic@3.20.0
npm WARN deprecated @ionic/cli-utils@1.19.2: Latest Ionic CLI does not use this package.
/usr/local/bin/ionic -> /usr/local/lib/node_modules/ionic/bin/ionic

> fsevents@1.2.4 install /usr/local/lib/node_modules/ionic/node_modules/fsevents
> node install

[fsevents] Success: "/usr/local/lib/node_modules/ionic/node_modules/fsevents/lib/binding/Release/node-v64-darwin-x64/fse.node" already installed
Pass --update-binary to reinstall or --build-from-source to recompile
+ ionic@3.20.0
added 323 packages from 157 contributors, removed 106 packages, updated 23 packages and moved 5 packages in 20.135s


Now update Cordova for this by using below command -

npm install -g cordova


Above command result is -
/usr/local/bin/cordova -> /usr/local/lib/node_modules/cordova/bin/cordova
+ cordova@8.1.2
updated 1 package in 3.948s


Now again try to build your project by using below command-
ionic cordova build ios


This should work but if you are getting below error -


Error: Node Sass does not yet support your current environment: OS X 64-bit with Unsupported runtime (64)
For more information on which environments are supported please see:


Run below command in your project -

npm rebuild node-sass


Above command will resolve the issue related to Node Sass. 


If you still having this issue, Check your Node version. In my case node version was “v6.14.1” So when I update none version to “v6.14.1” and run again this command.


You can check all released version of node on below URL -


Now after updating version run below command in your project -

ionic cordova build ios

Now in my case above command build the project successfully. Please try in your project and post a comment if you still have any issue to build the project.

Tuesday, January 8, 2019

Ionic content does not scroll when you add tap | press gesture


Hello All, This ionic scroll issue is mostly related to Android devices. I always face this issue in android only. It's within <ion-item> or <ion-card> or maybe some other tags. Please check below description for more information -


1. A solution for (tap) gesture -

To solve this issue please replace tap event with the click.

Issue -
<ion-item (tap)=“yourFunction()">

</ion-item>


Solution -
<ion-item (click)=“yourFunction()">

</ion-item>


2. A solution for (press) gesture -

Issue -
<ion-item (press)=“yourFunction()">

</ion-item>


Solution -
<ion-item (long-press)=“yourFunction()">

</ion-item>


First please create (press directive with selector name as long-press) a directive to solve this issue -

Now add below code in press directive -

import { Directive, ElementRef, OnInit, OnDestroy, Output, EventEmitter } from '@angular/core';
import { Gesture } from "ionic-angular/gestures/gesture";

@Directive({
  selector: '[long-press]'
})

export class PressDirective implements OnInit, OnDestroy {
  el: HTMLElement;
  pressGesture: Gesture;
  @Output('long-press') onPressRelease: EventEmitter = new EventEmitter();

  constructor(el: ElementRef) {
    this.el = el.nativeElement;
  }

  ngOnInit() {
    this.pressGesture = new Gesture(this.el);
    this.pressGesture.listen();

    this.pressGesture.on('press', (event) => {
      this.onPressRelease.emit('released');
    });
  }

  ngOnDestroy() {
    this.pressGesture.destroy();
  }
}


Now import this directive in your module file -

import { PressDirective } from '../directives/press/press';


@NgModule({
  declarations: [
    MyApp,
PressDirective,
],


});


Please check above all details. Hope so this will resolve your problem. If you still having any issue please add a comment on this post with some details. I will try to resolve your issue. Thanks!

Sunday, December 16, 2018

Failed to find 'ANDROID_HOME' environment variable


I am getting below error when I am trying to run project -

> cordova build android
Android Studio project detected
(node:15997) UnhandledPromiseRejectionWarning: Unhandled promise rejection (rejection id: 1): Failed to find 'ANDROID_HOME' environment variable. Try setting it manually.
Failed to find 'android' command in your 'PATH'. Try update your 'PATH' to include path to valid SDK directory.


To resolve this issue please run below commands in the terminal -

export ANDROID_HOME="/Users/chetandeshmukh/Library/Android/sdk"
export PATH="$ANDROID_HOME/platform-tools:$ANDROID_HOME/tools:$PATH"


How to find the Android SDK path?

First open android studio, Then click on SDK manager. For more info please check below image -


Now select Appearance & Behavior -> System Settings -> Android SDK


 Now copy your SDK location with the help of the above steps and update in command.


This process will set the Android Home path in your system.


Now try once again to run your project. This process will resolve your problem. If you still facing any issue please add your error in the comment section. We will resolve this. 

Sunday, December 9, 2018

Ionic round progressbar


To integrate this first we need to install the below module with the help of npm :

npm install angular-svg-round-progressbar --save

After installing this you need to import the RoundProgressModule in your module file :

import {NgModule} from '@angular/core';
import {RoundProgressModule} from 'angular-svg-round-progressbar';

@NgModule({
  imports: [RoundProgressModule]
})


Now in your page TS file add below lines -

export class RatePage {

  public selectedRange=0;

  
  constructor(public navCtrl: NavController) {

}

  close(){
    alert(this.selectedRange)
  }

  save(){
    alert(this.selectedRange)
  }

}


Now add below code in your html file -

<div class="main_box">
<div class="box">

 <div class="current">{{ selectedRange }}/{{ 100 }}</div>
 <round-progress
 [current]="selectedRange"
 [max]="100"
 [color]="'#45ccce'"
 [background]="'#eaeaea'"
 [radius]="80"
 [stroke]="20"
 [semicircle]="false"
 [rounded]="true"
 [clockwise]="true"
 [responsive]="false"
 [duration]="800"
 [animation]="'easeInOutQuart'"
 [animationDelay]="0"></round-progress>


<ion-range min="0" max="100" [(ngModel)]="selectedRange" color="secondary">
 <ion-label range-left>0</ion-label>
 <ion-label range-right>100</ion-label>
</ion-range>


<ion-row class="row">
 <ion-col class="col" col-6="">
     <button (click)="save()" class="login-btn button button-md button-default button-default-md" ion-button="" type="submit"><span class="button-inner">Submit
     </span><div class="button-effect"></div></button>
 </ion-col>
 <ion-col class="col" col-6="">
   <button (click)="close()" class="login-btn button button-md button-default button-default-md" ion-button="" type="submit"><span class="button-inner">Cancel
   </span><div class="button-effect"></div></button>
</ion-col>
</ion-row>


</div>

</div>


Add below code in your CSS file -

.scroll-content{
    padding: 0px !important;
}
.box{ margin: 0% 5%; padding: 0px 10px; font-size: 1.4rem; height: 60%; background-color: #fff; opacity: 1 !important; margin-top: 20%; border: 1px solid gray; }

round-progress{
    margin: 20% 25% 0% 25%;
}
.main_box{
    height: 100%;
}
[col-6]{
    text-align: center;
}
.range-md .range-knob, .range-ios .range-knob{
    width: 30px;
    height: 30px;
}
.range-md .range-bar, .range-ios .range-bar{
    top: 28px;
}
.label-md, .label-ios{ margin-top: 16px !important;}
.current {
    position: absolute;
    margin: 34% 25% 0% 35%;
    font-weight: 400;
    font-size: 2rem;
}


You can check more details on below link, also other options are available on below link -
https://github.com/crisbeto/angular-svg-round-progressbar

Check below demo link -
http://crisbeto.github.io/angular-svg-round-progressbar

Tuesday, November 27, 2018

Could not find play-services-tasks-license.aar (com.google.android.gms:play-services-tasks-license:11.8.0)


Could not find play-services-tasks-license.aar (com.google.android.gms:play-services-tasks-license:11.8.0).
Searched in the following locations:
    https://jcenter.bintray.com/com/google/android/gms/play-services-tasks-license/11.8.0/play-services-tasks-license-11.8.0.aar


Please follow below steps to solve this issue:-


Go to build.gradel 


and replace this -

buildscript {
    repositories {
        mavenCentral()
        jcenter()
    }
}

with this -

buildscript {
    repositories {
        google()
        mavenCentral()
        jcenter()
    }
}


And replace this - 

allprojects {
    repositories {
        mavenCentral();
        jcenter()
    }
}


With this -

allprojects {
    repositories {
        google()
        mavenCentral();
        jcenter()
    }
}


Now - Click on “Sync Now”


If you again face this issue - 

A problem occurred evaluating root project 'android'. > Could not find method google() for arguments [] on repository container of type org.gradle.api.internal.artifacts.dsl.DefaultRepositoryHandler.


To resolve this issue add this line in your gradel file -

dependencies {
        classpath 'com.android.tools.build:gradle:3.0.1'
    }


If you are having this issue in react native app. Please use this below lines in your gradel file -


buildscript {
    repositories {
        jcenter()
        google()
    }
    dependencies {
        classpath 'com.android.tools.build:gradle:3.0.1'
    }
}
allprojects {
    repositories {
        mavenLocal()
        jcenter()
        maven {
// All of React Native (JS, Obj-C sources, Android binaries) is installed from npm
            url "$rootDir/../node_modules/react-native/android"
        }
        google()
    }
}


Make sure to sync your project after doing all this. This will resolve your issue.