Tuesday, April 16, 2019

How to integrate wootric in ionic


Wootric integration with ionic 

There are two options to implement this -

Option 1 - Add below code after “build/main.js” Or add at the bottom of page.

<!-- start Wootric code -->
<script type="text/javascript" src="https://cdn.wootric.com/wootric-sdk.js"></script> 
<!-- end Wootric code -->


Now in your TS file (Where you want to trigger wootric survey) add below code -

/* Wootric code start */
 window['wootric_survey_immediately'] = true; // Comment out the line wootric_survey_immediately = true when you are ready for production. Alternatively, leave the line in the code for testing purposes or to survey the customer upon every visit to a specific page.
 window['wootricSettings'] = {
   email: (user.email)?user.email:'',
   created_at: Math.floor(Date.now() / 1000),
   account_token: "NPS-********”, // You need to update your account token here
   otherData: {
     city: user.city,
     role: user.role
   }
 };
// console.log('wootricSettings:', window['wootricSettings']);
//console.log('WootricSurvey');
window['WootricSurvey'].run("wootricSettings");
/* Wootric code end */


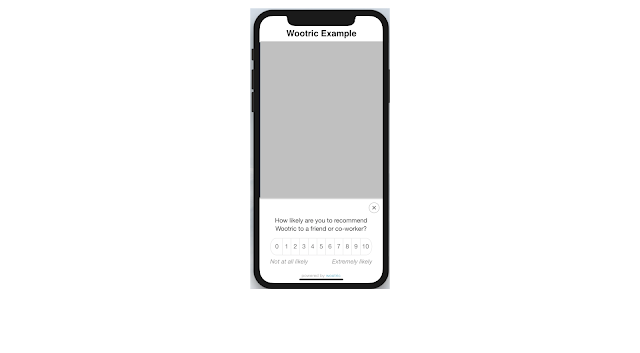
This will trigger wootric survey on the selected page.
Note - You need to update account token on “NPS-XXXXXXXX”

Here - user.email is user email id, otherData are additional data which you want to send on wootric.


Option 2 - You can also integrate into the ionic framework with the help of javascript code. To integrate this you just need to follow below steps -

Insert below javascript code in the bottom of your index.html file 

<!-- start Wootric code -->
<script type="text/javascript">
  window.wootric_survey_immediately = true; // Shows survey immediately for testing purposes. TODO: Comment out for production.
  window.wootricSettings = {
    email: 'customerEmail@example.com', // TODO: Required to uniquely identify a user. Email is recommended but this can be any unique identifier.
    //external_id: '123abc', // TODO: Reference field for external integrations only. Send it along with email. OPTIONAL
    created_at: 1234567890, // TODO: Date as a 10 digit Unix timestamp in seconds. OPTIONAL
    account_token: 'NPS-XXXXXXXX' // This is your unique account token.
  };
</script>
<script type="text/javascript" src="https://cdn.wootric.com/wootric-sdk.js"></script>
<script type="text/javascript">
  // This loads the Wootric survey
  window.wootric('run');
</script>
<!-- end Wootric code -->


This will trigger wootric survey when your all launch.  


You can check more about this on this URL (Reference URL) - https://engineering.wootric.com/testing-the-wootric-sdk-with-ionic-framework


If you have any questions you can post here in the comment section. Thanks, All the best.

Sunday, April 7, 2019

App not setup this app is still in development mode and you don't have access to it


To integrate Facebook with your app you need to create app inside of Facebook developer portal. You can create by using below URL -

https://developers.facebook.com/apps

Here you will see add a new app option -


Now after creating the app, you will get App ID and App Name from Facebook. This you need to integrate FB in your app.


Now please follow the below steps to integrate FB -

STEP 1: Go to the “Settings” tab and select the “Basic” option. Now add your contact Email.


STEP 2: After step 1 please select “Facebook Login” tab then select “Settings” option from here. Now from top right section enable “Status”. So that your app will be live.


If you got this error - You must provide a valid Privacy Policy URL in order take your app Live. So you need to move in the "Basic Settings" section and make sure all details are valid.


Now, You need to add a Privacy policy URL in the basic setting tab. (Settings -> Basic ->Privacy Policy URL)


After adding this again enable “Status” from the top right corner. Now your app will be available for live users.


Note - If you are in development mode then you can check functionality by using your own FB login details by which you have created FB app. This account doesn't need to make the app live.

The best way to test the app is to create test users of the app. You can create from "Roles" then "users" from the side menu section.


Monday, April 1, 2019

How to Invite users to your App Store Connect Account


You can add multiple users with different roles in iTunes Connect  /  App Store Connect. For this, you need to follow below steps - 

Step 1- Open iTunes Connect login page. Here you need to enter your Apple ID and Password. Use this link to log in -


Step 2 - Now after successful login you will see a screen ( check below image), From here you need to select “Users and Access” option.   


Step 3 - Now after this you can see a Plus (+) icon in people section (Check below image). Click on this Plus icon.


Step 4 - Now, You will see a form. Here you need to fill details of a user (First Name, Last Name,  Email, Roles, etc).  Here in the Roles section you can see different roles, Select what you want from here. After filling all the details click on the Invite button. Now the user is invited based on role selection. That user needs to check his/her email to accept the invitation.


To get details about roles, Please check below URL -


This is a process to invite users. If you have any questions please post a comment.