Sunday, August 11, 2019

ITMS-90338: Non-public API usage - The app references non-public selectors in _setAlwaysRunsAtForegroundPriority


I got below email from apple - 

Dear Developer,
We identified one or more issues with a recent delivery for your app, 
"-------". Please correct the following issues, then 
upload again.
ITMS-90338: Non-public API usage - The app references non-public 
selectors in ----: _setAlwaysRunsAtForegroundPriority:. If method names 
in your source code match the private Apple APIs listed above, altering 
your method names will help prevent this app from being flagged in 
future submissions. In addition, note that one or more of the above APIs 
may be located in a static library that was included with your app. If 
so, they must be removed. If you think this message was sent in error 
and that you have only used Apple-published APIs in accordance with the 
guidelines, send the app's Apple ID, along with detailed information 
about why you believe the above APIs were incorrectly flagged, to 
appreview@apple.com. For further information, visit the Technical 
Support Information at http://developer.apple.com/support/technical/
Best regards,
The App Store Team


Solution - This mostly comes with ionic / Cordova / Phonegap / Hybrid Apps. Please follow the below steps to solve this issue -
  
Stpe 1 -
cordova plugin rm cordova-plugin-ionic-webview

Stpe 2 -
cordova plugin add cordova-plugin-ionic-webview@4.1.0

This solved my problem. Hope so this will also work for you. If you have any questions related with this you can post a comment here.

Saturday, June 8, 2019

How to add slider in flutter


You can add slider in flutter with the help of “intro_slider” plugin. To integrate this please follow below steps -


Add below line in your pubspace.yam file -

dependencies:
  intro_slider: ^2.2.0


Now click on “Package get” option from top section to get this package in your app.


Now, Import below package in your file -

import 'package:intro_slider/intro_slider.dart';


Note - Make sure to add your images in pubspace.yaml file like this -

assets:
  - assets/images/photo_eraser.png
  - assets/images/photo_pencil.png
  - assets/images/photo_ruler.png


Slider images for Android and iOS


Create a new class as below -

import 'package:flutter/material.dart';
import 'package:intro_slider/dot_animation_enum.dart';
import 'package:intro_slider/intro_slider.dart';
import 'package:intro_slider/slide_object.dart';


class TutorialScreen extends StatefulWidget{

  TutorialScreen({Key key}) : super(key: key);

  @override
  TutorialScreenState createState() => new TutorialScreenState();

}


class TutorialScreenState extends State<TutorialScreen>{
  List<Slide> slides = new List();

  @override
  void initState() {
    super.initState();

    slides.add(
      new Slide(
        title: "ERASER",
        description: "Allow miles wound place the leave had. To sitting subject no improve studied limited",
        pathImage: "assets/images/photo_eraser.png",
        backgroundColor: Color(0xfff5a623),
      ),
    );
    slides.add(
      new Slide(
        title: "PENCIL",
        description: "Ye indulgence unreserved connection alteration appearance",
        pathImage: "assets/images/photo_pencil.png",
        backgroundColor: Color(0xff203152),
      ),
    );
    slides.add(
      new Slide(
        title: "RULER",
        description:
        "Much evil soon high in hope do view. Out may few northward believing attempted. Yet timed being songs marry one defer men our. Although finished blessing do of",
        pathImage: "assets/images/photo_ruler.png",
        backgroundColor: Color(0xff9932CC),
      ),
    );
  }

  void onDonePress() {
    // Do what you want
  }

  @override
  Widget build(BuildContext context) {
    return new IntroSlider(
      slides: this.slides,
      onDonePress: this.onDonePress,
    );
  }

}


Now call this from your main.dart file by using below code -

class MyApp extends StatelessWidget {
  // This widget is the root of your application.
  @override
  Widget build(BuildContext context) {
    return MaterialApp(
      title: 'Flutter Demo',
      theme: ThemeData(
        primarySwatch: Colors.blue,
      ),
      home: TutorialScreen(),
      debugShowCheckedModeBanner: false
    );
  }
}


This plugin have many options you can check all available options on below urls -


How to change project name in flutter


Solution for Android -

This is very simple in flutter, If you want to change the project name which will display on the mobile app. First, open your project in android studio or in any editor and then navigate to android/app/src/main/AndroidManifest.xml 


After this, you have to change the label value in AndroidManifest.xml  for android:label 

<application
    android:name="io.flutter.app.FlutterApplication"
    android:label=“APP Name”
    android:icon="@mipmap/ic_launcher">


Just replace “APP Name” with your app name. Now run your project in android simulator/device. 
Note - If changes are not updating then please uninstall your existing build and install again.


Solution for iOS - To update app name in iOS you just need to navigate on below location - 

ios/Runner/Info.plist


Now search for “CFBundleName” in Info.plist file and replace its value with your app name. Please check below example - 

<key>CFBundleName</key>
<string>APP Name</string>

Now, Run the app in simulator/Device. This will update your app name.

Note - Same as Android if the app name is not updating then please uninstall your existing build and install again.


This will update the app name for both (Android and iOS). 

Saturday, May 25, 2019

How to disable "Google Play Protect"?


Recently Google has added some security system updates. This not allow the app to install outside from Google pay. That is called the “Play Protect”. Google did this to manage some security futures. To prevent this you need to follow the below steps to disable Google Play Protect related to Google Play. To disable this please follow below steps - 

Step 1 - Open play store application from your device. Check the below screen.


Step 2 - Tap on the menu button. Check the below screen.


Step 3 - Select “Play protect” option from the menu list. Check the below screen.


Step 4 - Now disable the “Scan device for security threads”. Check the below screens.


In short, you need to follow this -

Open "Play Store" App in your mobile => Tap on Menu button from left side => Select "Play Protect" option in menu list => Now, Disable the options "Scan device for security threats".

Now you will be able to install your development app.


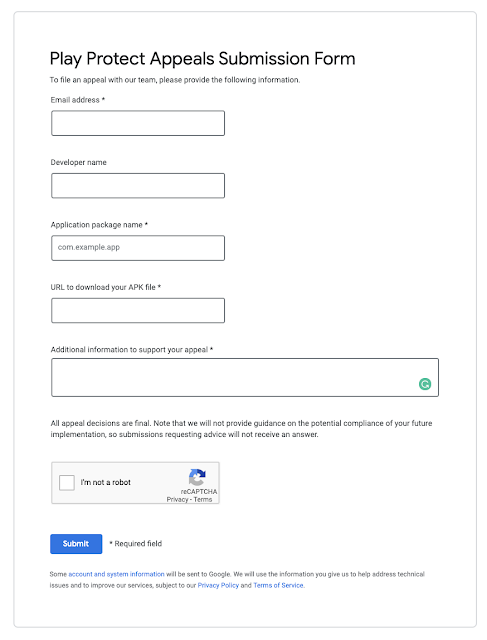
This has other permanent solution - You need to submit your app to Google for review on below URL then after few days this problem will be fixed for your app.


Play Protect Appeals Submission Form URL -  https://support.google.com/googleplay/android-developer/contact/protectappeals


Thursday, May 9, 2019

Top 10 ionic themes

Ionic market (https://market.ionicframework.com/) is a place where you can find themes and plugins related to the ionic framework. Some of them are below - 


1. ionBooking - Ionic 3 Hotel Booking Theme


This theme is related to hotel booking reservation, rent a car and tour activities. This supports many platforms (Android & iOS) and Web Apps (PWA). 

What is in this theme - Login, SignUp, Home, Edit Profile, Local Weather, Settings, Favorites, Booking list, Hotel search result, Hotel details, Hotel reviews modal, Hotel checkout, Message List, Message Detail, Rent a Car search, Rent a Car search results, Rent a Car Details, Rent a Car Checkout, Reviews, Tab Reviews, Tour Activities search, Tour Activities search results, Tour Activities Details, Tour Activities Checkout, Support, etc... 


Ionic Market link of this Theme - https://market.ionicframework.com/themes/ionbooking

Theme Demo URL - https://www.youtube.com/watch?v=3-mfpFlgegw


2. ionNetflix


This theme is related to film and television production as well as online distribution. This is available in ionic 3.x for Android and iOS platform. 


Ionic Market link of this Theme - https://market.ionicframework.com/themes/ionnetflix

Theme Demo URL - 


3. ionSpotify

This theme is for music, video and podcast services. This is available in ionic 3.x for Android and iOS platform. 

Ionic Market link of this Theme - https://market.ionicframework.com/themes/ionspotify

Theme Demo URL - 


4. ionFacebook

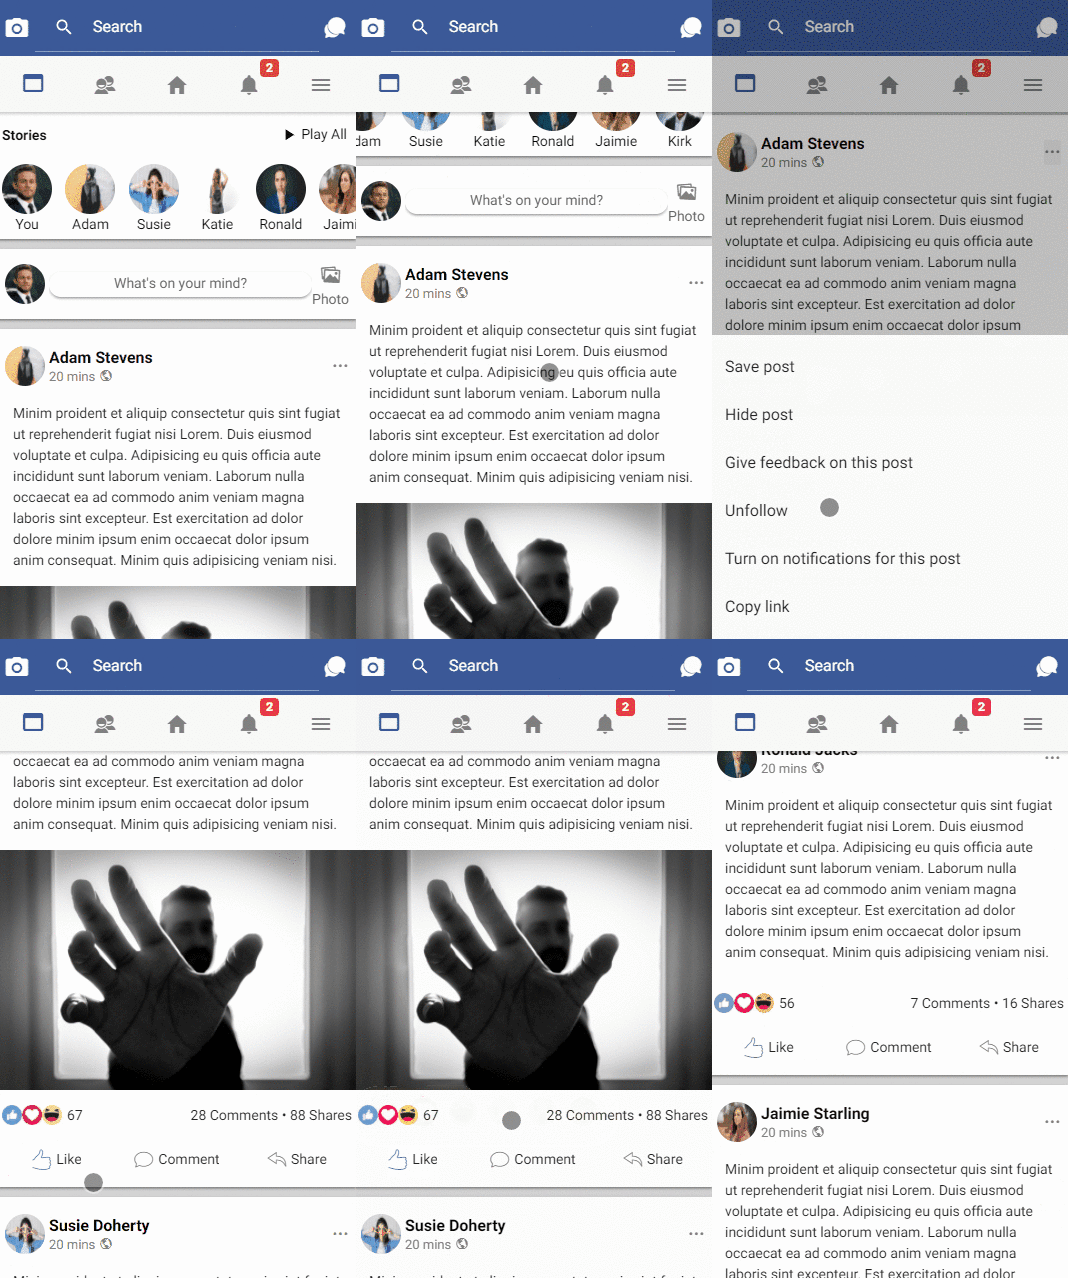
This theme UI is related to the Facebook app. This is available in ionic 3.x for Android and iOS platform. 

Ionic Market link of this Theme - https://market.ionicframework.com/themes/ionfacebook

Theme Demo URL - 


5. ionProperty - Ionic 3 Real Estate Properties Theme


This theme is related to real estate, It focused to buy, rent and sell your properties. This is available for Android, iOS, and PWA. It supports ionic 2.x,3.x

What is in this theme - Initial Slider, Auth, Home, Timeline, Settings, Invoices, Checkout, Chat with Broker, My Account, Authentication, Messages, Message Detail, Properties, Property Detail, Property Filter, Brokers, Broker Detail, Favorites, Get Pre-Approved, Your Property, About, Support, Schedule Visit, etc…


Ionic Market link of this Theme - https://market.ionicframework.com/themes/ionproperty

Theme Demo URL - https://www.youtube.com/watch?v=J0foFmlgY1s&feature=youtu.be


6. foodIonic - Ionic 3 Restaurant Food Order Theme


This theme is related to the restaurant food order. It focused on food and dishes order system. It supports Android, iOS, and PWA. It supports ionic 2.x,3.x

Pages in this theme - Home, About, Auth (Login & Register), Cart, Category, Checkout, Dish List, Dish Detail, Favorites, Favorite Dish, Message List, Message Detail, My Account, Near By, Notifications, Orders, Restaurant List, Restaurant Detail, Restaurant Filter, Settings, Support, Walkthrough, Your Restaurant, etc...


Ionic Market link of this Theme - https://market.ionicframework.com/themes/foodionic

Theme Demo URL - https://www.youtube.com/watch?v=PLVdB_DzBac


7. ionMessenger


This is related to messenger UI. This is very simple UI and it supports ionic 3.x, This is available for Android and iOS platforms.

Ionic Market link of this Theme - https://market.ionicframework.com/themes/ionmessenger

Theme Demo URL - 


8. Tinder UI 2


This is related to dating application. In this user can chat, it also has swiping cards UI. It supports ionic 2.x,3.x, This is available for iOS and Android platform. 

Screens available in this - Welcome, Explore (Swiping), Me, Settings, Tinder Plus, Profile, Profile Edit, Matched, Messaging, Feed, Chat (including Giphy-2 plugin)

Ionic Market link of this Theme - https://market.ionicframework.com/themes/tinder-ui-2

Theme Demo URL - https://www.youtube.com/watch?v=1iue76Dhx3o&feature=youtu.be


9. ionic ecommerce UI


This theme is related to E-commerce application. It support ionic 3/4. This is very easy to implement. It support for iOS, Android and Windows platforms. 

Screens available in this theme - Login, Sigup, Home, Categories, Category, Item detail, Filter, Attribute, Item options, Cart, Place order, Wishlist, My account, Setting, Welcome, Forgot password, Change password, My order

Ionic Market link of this Theme - https://market.ionicframework.com/themes/ionic-2-ecommerce-ui

Theme Demo URL - https://www.youtube.com/watch?v=wdOh1kXXY4g


10. Linkedin UI 2


This supports iOS and Android platforms. This is also available in ionic 2.x,3.x

Screens available - Welcome, Log in/Sign up, Side menu with zooming effect (pretty cool!), Home (news feed), Post, New Post, Search, Messaging, Chat, Network, Network Connections, Nofitications, Jobs, Settings, Profile


Ionic Market link of this Theme - https://market.ionicframework.com/themes/ionic-linkedin-2

Theme Demo URL - https://www.youtube.com/watch?v=Or-U0YAiqsc&feature=youtu.be


Tuesday, April 16, 2019

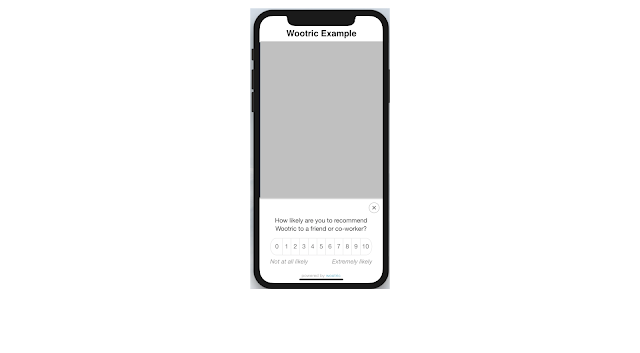
How to integrate wootric in ionic


Wootric integration with ionic 

There are two options to implement this -

Option 1 - Add below code after “build/main.js” Or add at the bottom of page.

<!-- start Wootric code -->
<script type="text/javascript" src="https://cdn.wootric.com/wootric-sdk.js"></script> 
<!-- end Wootric code -->


Now in your TS file (Where you want to trigger wootric survey) add below code -

/* Wootric code start */
 window['wootric_survey_immediately'] = true; // Comment out the line wootric_survey_immediately = true when you are ready for production. Alternatively, leave the line in the code for testing purposes or to survey the customer upon every visit to a specific page.
 window['wootricSettings'] = {
   email: (user.email)?user.email:'',
   created_at: Math.floor(Date.now() / 1000),
   account_token: "NPS-********”, // You need to update your account token here
   otherData: {
     city: user.city,
     role: user.role
   }
 };
// console.log('wootricSettings:', window['wootricSettings']);
//console.log('WootricSurvey');
window['WootricSurvey'].run("wootricSettings");
/* Wootric code end */


This will trigger wootric survey on the selected page.
Note - You need to update account token on “NPS-XXXXXXXX”

Here - user.email is user email id, otherData are additional data which you want to send on wootric.


Option 2 - You can also integrate into the ionic framework with the help of javascript code. To integrate this you just need to follow below steps -

Insert below javascript code in the bottom of your index.html file 

<!-- start Wootric code -->
<script type="text/javascript">
  window.wootric_survey_immediately = true; // Shows survey immediately for testing purposes. TODO: Comment out for production.
  window.wootricSettings = {
    email: 'customerEmail@example.com', // TODO: Required to uniquely identify a user. Email is recommended but this can be any unique identifier.
    //external_id: '123abc', // TODO: Reference field for external integrations only. Send it along with email. OPTIONAL
    created_at: 1234567890, // TODO: Date as a 10 digit Unix timestamp in seconds. OPTIONAL
    account_token: 'NPS-XXXXXXXX' // This is your unique account token.
  };
</script>
<script type="text/javascript" src="https://cdn.wootric.com/wootric-sdk.js"></script>
<script type="text/javascript">
  // This loads the Wootric survey
  window.wootric('run');
</script>
<!-- end Wootric code -->


This will trigger wootric survey when your all launch.  


You can check more about this on this URL (Reference URL) - https://engineering.wootric.com/testing-the-wootric-sdk-with-ionic-framework


If you have any questions you can post here in the comment section. Thanks, All the best.

Sunday, April 7, 2019

App not setup this app is still in development mode and you don't have access to it


To integrate Facebook with your app you need to create app inside of Facebook developer portal. You can create by using below URL -

https://developers.facebook.com/apps

Here you will see add a new app option -


Now after creating the app, you will get App ID and App Name from Facebook. This you need to integrate FB in your app.


Now please follow the below steps to integrate FB -

STEP 1: Go to the “Settings” tab and select the “Basic” option. Now add your contact Email.


STEP 2: After step 1 please select “Facebook Login” tab then select “Settings” option from here. Now from top right section enable “Status”. So that your app will be live.


If you got this error - You must provide a valid Privacy Policy URL in order take your app Live. So you need to move in the "Basic Settings" section and make sure all details are valid.


Now, You need to add a Privacy policy URL in the basic setting tab. (Settings -> Basic ->Privacy Policy URL)


After adding this again enable “Status” from the top right corner. Now your app will be available for live users.


Note - If you are in development mode then you can check functionality by using your own FB login details by which you have created FB app. This account doesn't need to make the app live.

The best way to test the app is to create test users of the app. You can create from "Roles" then "users" from the side menu section.


Monday, April 1, 2019

How to Invite users to your App Store Connect Account


You can add multiple users with different roles in iTunes Connect  /  App Store Connect. For this, you need to follow below steps - 

Step 1- Open iTunes Connect login page. Here you need to enter your Apple ID and Password. Use this link to log in -


Step 2 - Now after successful login you will see a screen ( check below image), From here you need to select “Users and Access” option.   


Step 3 - Now after this you can see a Plus (+) icon in people section (Check below image). Click on this Plus icon.


Step 4 - Now, You will see a form. Here you need to fill details of a user (First Name, Last Name,  Email, Roles, etc).  Here in the Roles section you can see different roles, Select what you want from here. After filling all the details click on the Invite button. Now the user is invited based on role selection. That user needs to check his/her email to accept the invitation.


To get details about roles, Please check below URL -


This is a process to invite users. If you have any questions please post a comment. 

Tuesday, March 19, 2019

No toolchains found in the NDK toolchains folder for ABI with prefix: mipsel-linux-android


This error comes due to NDK version mismatch, To resolve this error you have to download an older version of NDK and need to remap NDK path. Then you can build the project successfully. To do this please follow the below steps -

1. First, you need to open the NDK downloader page. You can open by using below URL -
https://developer.android.com/ndk/downloads/

2. Now at the bottom of this page, you can see "older versions of the NDK" and click on "NDK Archives" tag to see all older versions.


3. Agree with the Terms from this page by clicking on "I agree to the terms" button. After this, you can see all older versions of NDk.


4. Download your NDK older version from this list. In my case, it was "Android NDK, Revision 14b".


5. Open Android NDK location directory. You can check location from File -> Project Structure -> SDK location. Check below image for more information -


6. Now, Extract file which you have downloaded and move that folder in toolchains folder - (Or you can delete toolchain folder and past our recent downloaded toolchain on this location)


7. After this, you need to rebuild the project. 


This will resolve your issue. In some case, you can also try below solution -

Open Android Studio and go to File -> Project Structure -> SDK location, uncheck NDK If you do not need this, and then restart android studio. This will resolve your issue.


Please post a comment if you are still having an issue in this. I will try to resolve that issue.